Floyd-Steinberg Dithering
Posted on 13 October 2021
Floyd-Steinberg dithering is a technique for reducing the colour palette of an image (for example, to reduce its file size) whilst keeping as much of the perceived detail as possible. For each pixel in the original image, the nearest colour to that pixel is chosen from a restricted palette and any "error" (difference in pixel colour value, original - new) is distributed across the neighbouring pixels as follows:
$$ \begin{array}{ccc} 0 & 0 & 0 \\ 0 & * & \frac{7}{16} \\ \frac{3}{16} & \frac{5}{16} & \frac{1}{16} \end{array} $$
The pixel under consideration is labelled $*$ in the above. Since the pixels above and to the left of this pixel are not affected, the algorithm can be applied by scanning the image once, top-to-bottom, left-to-right.
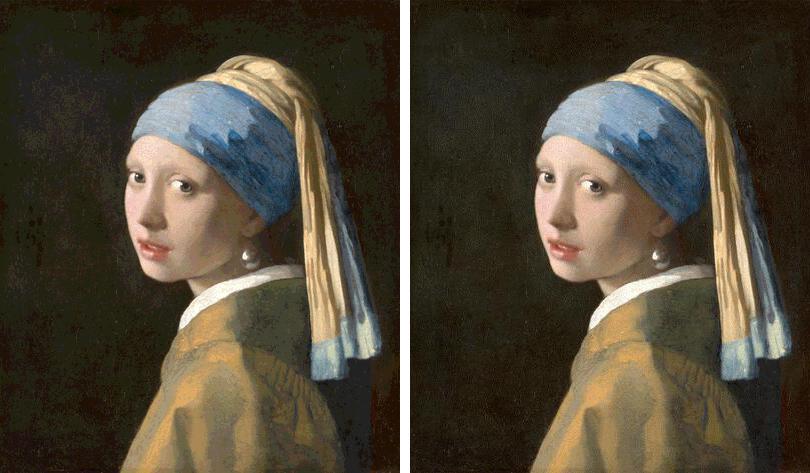
The Python code below demonstrates the Floyd-Steinberg dithering technique, in comparison with simply choosing the nearest colour value from the restricted palette for each pixel. The image used is Vermeer's Girl with a Pearl Earring (either a tronie masterpiece or a depiction of gratuitous cultural appropriation depending on your point of view):
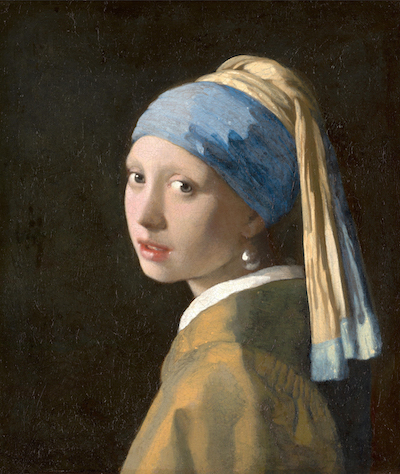 This image is available from Wikimedia as 1665_Girl_with_a_Pearl_Earring.jpg.
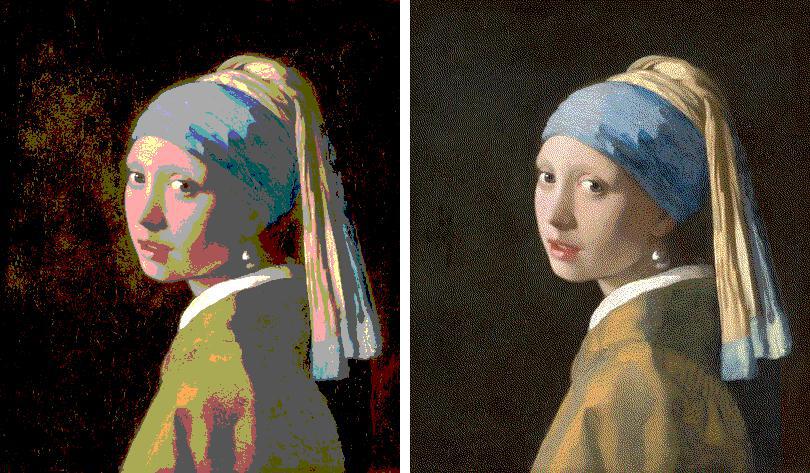
The original uses one byte for each of the red, green and blue channels giving a palette of $256^3 = 16,777,216$ colours. Setting nc=2 in the fs_dither method below will restrict the palette to one bit (two colours) per channel and $2^3 = 8$ colours. The dithering algorithm (right hand side, below) clearly gives a better representation of the orignal image than simply replacing each pixel's colour with its nearest representation in the restricted palette (left hand side):
nc = 2 (two colours per RGB channel):
import numpy as np
from PIL import Image

GREYSCALE = False
img_name = '1665_Girl_with_a_Pearl_Earring.jpg'

# Read in the image, convert to greyscale.
img = Image.open(img_name)
if GREYSCALE:
    img = img.convert('L')

width, height = img.size
new_width = 400
new_height = int(height * new_width / width)
img = img.resize((new_width, new_height), Image.ANTIALIAS)

def get_new_val(old_val, nc):
    """
    Get the "closest" colour to old_val in the range [0,1] per channel divided
    into nc values.

    """

    return np.round(old_val * (nc - 1)) / (nc - 1)

# For RGB images, the following might give better colour-matching.
#p = np.linspace(0, 1, nc)
#p = np.array(list(product(p,p,p)))
#def get_new_val(old_val):
#    idx = np.argmin(np.sum((old_val[None,:] - p)**2, axis=1))
#    return p[idx]

def fs_dither(img, nc):
    """
    Floyd-Steinberg dither the image img into a palette with nc colours per
    channel.

    """

    arr = np.array(img, dtype=float) / 255

    for ir in range(new_height):
        for ic in range(new_width):
            # NB need to copy here for RGB arrays otherwise err will be (0,0,0)!
            old_val = arr[ir, ic].copy()
            new_val = get_new_val(old_val, nc)
            arr[ir, ic] = new_val
            err = old_val - new_val
            # In this simple example, we will just ignore the border pixels.
            if ic < new_width - 1:
                arr[ir, ic+1] += err * 7/16
            if ir < new_height - 1:
                if ic > 0:
                    arr[ir+1, ic-1] += err * 3/16
                arr[ir+1, ic] += err * 5/16
                if ic < new_width - 1:
                    arr[ir+1, ic+1] += err / 16

    carr = np.array(arr/np.max(arr, axis=(0,1)) * 255, dtype=np.uint8)
    return Image.fromarray(carr)


def palette_reduce(img, nc):
    """Simple palette reduction without dithering."""
    arr = np.array(img, dtype=float) / 255
    arr = get_new_val(arr, nc)

    carr = np.array(arr/np.max(arr) * 255, dtype=np.uint8)
    return Image.fromarray(carr)

for nc in (2, 3, 4, 8, 16):
    print('nc =', nc)
    dim = fs_dither(img, nc)
    dim.save('dimg-{}.jpg'.format(nc))
    rim = palette_reduce(img, nc)
    rim.save('rimg-{}.jpg'.format(nc))
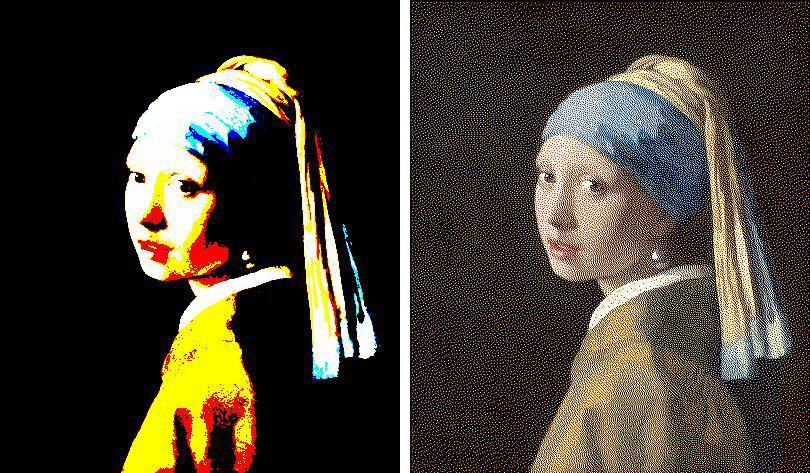
More images with different values of nc:
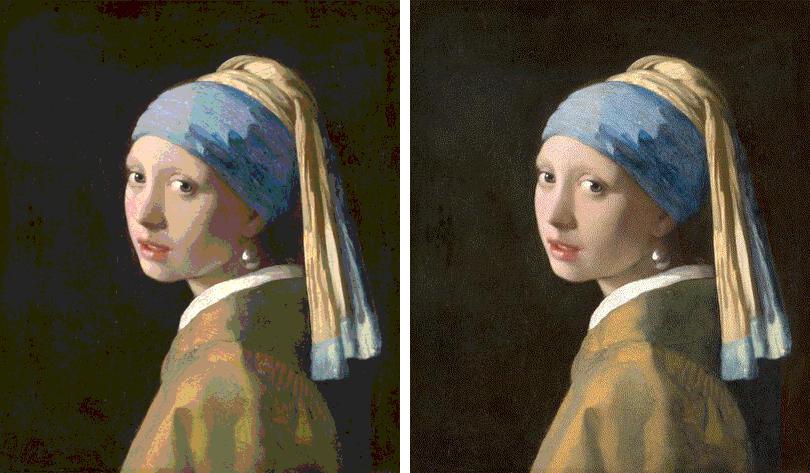
nc = 3 (three colours per RGB channel):
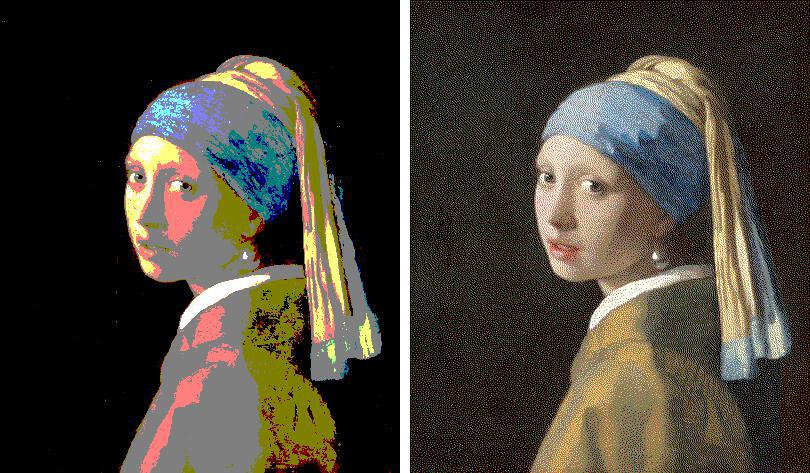
nc = 4 (four colours per RGB channel):
nc = 8 (eight colours per RGB channel):
nc = 16 (16 colours per RGB channel):